I'm now blogging at http://craftingandcardigans.blogspot.com
Please follow me there!
Friday, September 9, 2011
This blog has moved
Wednesday, September 7, 2011
Flavor of the Week (with a tutorial!)
I have a new obsession, folks.
Wreaths. To be specific, yarn wreaths.
They're inexpensive, not too hard to make and completely precious! Just look at some of my favorites from Pinterest!

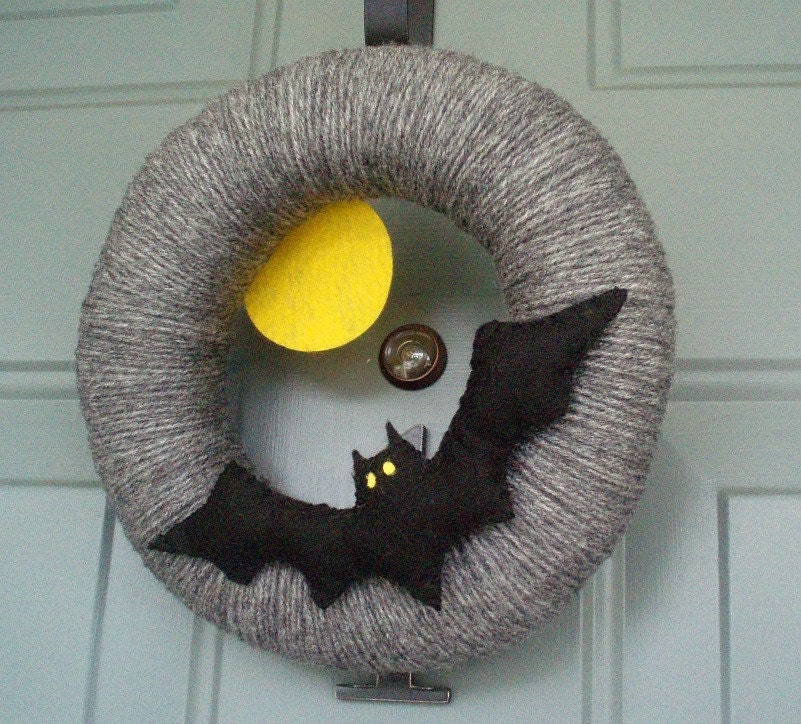


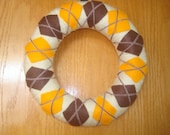
I have definite plans to make the American flag, candy cane and Halloween wreaths and I already tried my hand at the argyle wreath (because you know I love me some argyle) a couple weeks ago. Take a look.

I'd say the hardest parts of the project were picking out my color scheme and cutting out the diamonds. I learned that night that I am AWFUL at drawing and subsequently cutting out both diamonds and triangles. I'm also awful at taking tutorial pictures. But here's what I did...
Argyle Yarn Wreath Tutorial
What you will need:
Yarn
Felt to make diamonds
Foam wreath form (or plumbing tubing formed into a circle and duct taped in place)
Cardstock (for making diamond stencil)
Push pins
Glue (hot, super, tacky, fabric...choose your weapon)
Ribbon
What to do:
1. Choose your color scheme. I chose charcoal gray, heather gray and that bright, sunny yellow. Happily, I have leftovers I can use on the Halloween wreath.
2. Tie one end of the yarn around the wreath and secure with a knot, then wrap the entire thing until it's all covered without any holes. I took my time so that I wouldn't have to do second layer. Tie a knot at the end.
3. Cut out your diamonds. Like I said before, I'm awful at drawing and cutting. So I folded a piece of cardstock in half and drew a small triangle. Then I cut it out, unfolded it, and had a diamond. I used that triangle to trace the rest of my diamonds, half yellow and half gray.
4. Pin your diamonds to the wreath where you want them. This helps to prevent them from going all over the place.
5. Wrap your yarn around the wreath once more to create the criss-cross pattern. Do one diagonal first and then the other.
6. When everything looks the way you want, remove the pins and use glue to permanently secure the diamonds.
7. Loop a ribbon around the top so you'll have something to hang it by. I still haven't done this to mine but plan to...someday...
Sources:
https://blogger.googleusercontent.com/img/b/R29vZ2xl/AVvXsEgqSlq_LJrMx1y3lkeMHVqYVPR9zeN8pxCqrWq7uYzLMfbVmSfEkKLaaVFvxT8gtYMzgBlXR5g57vChSZEdTOdcjKIzUtr-mYlOG4KimAlF3Cd71JPGI2SjwLfml3oD1KgJEApMKxmQHBU/s1600/IMG_9198.JPG
https://blogger.googleusercontent.com/img/b/R29vZ2xl/AVvXsEi87dUQxFDLhLfnPtP5dwloxuE9-o-UDTarkxbthLuDsWDHWWUdkscXiDPUpzB8AwryVVC2HX12TFPwR5A1cQ-LteFSsHzX-1-urDADxCQMNzFOQSTbpxD2niVKmbitxLJVymvP4tSmxJ99/s1600/010.jpg
http://ny-image2.etsy.com/il_fullxfull.171564218.jpg
https://blogger.googleusercontent.com/img/b/R29vZ2xl/AVvXsEjuXT6leMXG4m-HaEMf28_jnOLR5peojuJgCe-DtfB6ed5b30hpS8laG6b3DXVMsOR2LlNxThU0lk2P48Mxb17jr24YqkZLSmDcCUX9YFAcg6kCaWU2p-2DO_rb6OOig2BYVjzLsXp9gzo/s320/knockknocking+hostess.jpg
http://ny-image3.etsy.com/il_170x135.210243019.jpg
Thursday, September 1, 2011
Blast from the Past
I was perusing Pinterest on my phone just now and one of the first items I saw was shoe clips. I guess I'd seen them before but I forgot about them. Basically, you just clip the little bow, flower, whatever, on your shoe to jazz them up a little.
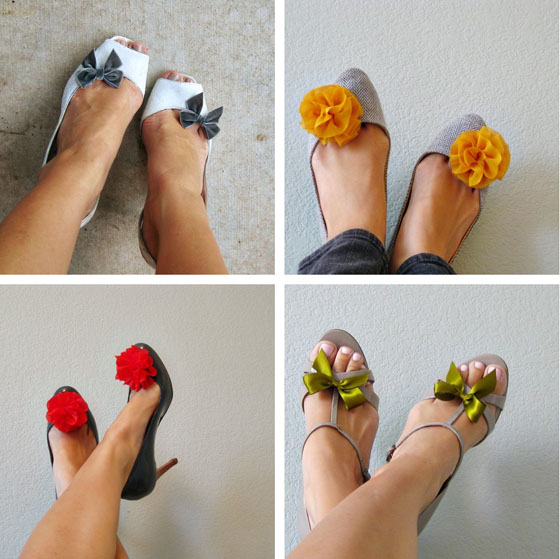
Cute, right? But this post is not about shoe clips. This post is about what shoe clips made me think of...
 http://images4.wikia.nocookie.net/__cb20110401004625/muppet/images/1/19/Bowbiters-misspiggy.jpg
Thank you Pinterest for this little walk down memory lane. Did you have bow biters when you were a kid? Did you love them as much as I did (and still do)?
Thursday, August 25, 2011
What I've Been Doing Lately
Lately I've been feeling pretty crafty. And I've been super-inspired by pinterest .
First I worked on a project for my gallery wall. Inspired by this little beauty:
 I created this:
 All it took was one trip to Goodwill, one trip to Michael's and a final trip to Jo-Ann Fabric. I spray painted the frame and the letter was already white. I used spray adhesive to attach the fabric to a piece of cardboard then super glued the letter to the fabric and set a Yankee Candle on the letter for a few days so it would be good and stuck. Admittedly, I'm not the best planner when it comes to projects, hence the trip to Jo-Ann's and the slightly-off-center Y, but I like the way this one turned out.
The second project was inspired by this, another Pinterest find. 
I started with this drab, pretty plain coffee table that we've used for the past two years but don't really need anymore since we got a super-sweet ottoman/coffee table combo.  Conveniently, the legs screwed right off so I was left with a giant easy-to-work with slab. First I laid my fabric on the floor with the underside facing up. Then I laid batting on top of it. I was originally going to use foam padding too, but as I said before, I'm a bad project planner and I didn't have enough foam. So I just used batting and fabric. We likely won't have many people sitting on it so plush-ness isn't a huge concern. Plus, that helped this project come in at just under $20!

Next I laid the table on the batting, bottom side up.

Next I pulled the fabric and batting tight around the side and secured it with a staple gun. Fun fact though, "universal staples" aren't universal. Universal staples do not fit the staple gun that I purchased, despite the fact that they were 6mm and the gun is supposed to take 6mm staples. But the kind Lowes employee in the door department had me covered.
 Then all I had to do was screw the legs back in and flip her over. I really like how it turned out. I still need to paint the legs brown since it was raining today, but I'm doing that this weekend.
 Before my little makeover this table was sitting across from the front door and was where I threw my purse and mail when I came in the door. It will still do that, it will just look snazzier doing it now.
Wednesday, August 17, 2011
Flavor of the Week
I'm absolutely obsessed with gallery walls these days.
Seriously people, how awesome are these?


There are some out there that are made up of lots of frames of the same color, but that's really just not my style. I love how these include signs and graphics and not just photos. There are still some boxes to be unpacked, an office to organize and a guest bed to put together (stop judging me), but this is one project that I'm looking forward to tackling someday soon.
Photos borrowed from: http://www.andreasteed.com/node/1174, http://www.houseoftorquoise.com/, http://iammommahearmeroar.blogspot.com/2011/08/gallery-wall.html
Wednesday, August 10, 2011
Flavor of the week
Isn't she beautiful?
 Please ignore the papers scattered everywhere. There's no time for being orderly in this cubicle.
Monday, August 8, 2011
My Weekend
How was my weekend, you ask?
Paul bought this:

He called it an investment in the future.
That's how my weekend was.
Subscribe to:
Posts (Atom)
